West Fork Hopper (And Cricket)
Background: Originally, I named it the "Feather-weight Foam Hopper". After the first cast landed an 18" Brown on the West Fork of the Kickapoo River the fly got renamed. If needed, trim some foam from the bottom of the fly to increase hook gape. Experiment, have some fun!!
Tying instructions:
- Start the tying tread over the hook point and secure it. Take the hook out of the vise.
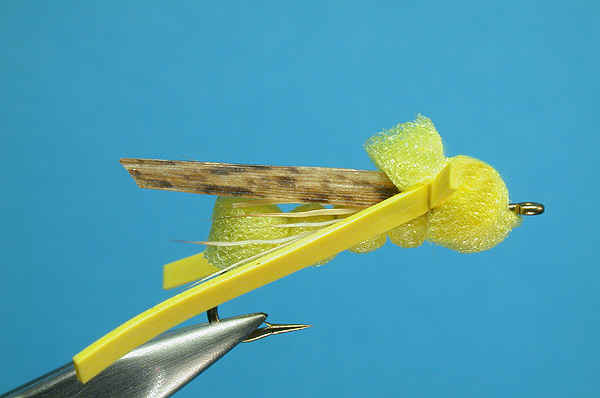
- Cut a piece of foam that is a hook gap in width and a half inch or more longer than the hook shank. Trim one end to a rounded point.
- Pierce the hook through the foam, leaving the rounded end toward the back. The foam should extend along the bottom of the hook shank.
- Secure the thread with 3-5 wraps of thread and place a bit of head cement on the wraps.
- Advance the tread over the bare hook shank in tight winds forward about 1/5 of the hook shank. Place head cement over the wraps for added durability. Secure the foam with 3-5 wraps. It should form a rounded segment with the seam along the top of the shank.
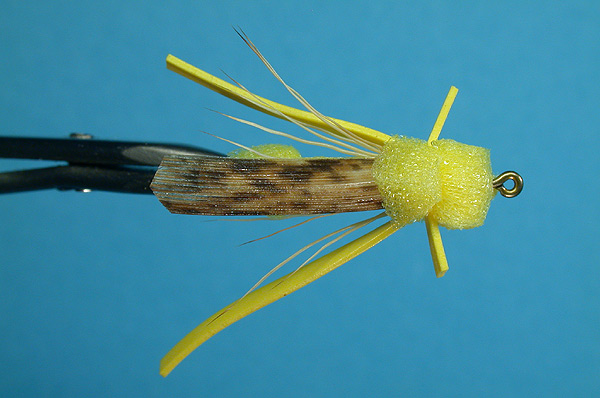
- Repeat STEP 5 twice more. This should leave you at 2/5 of a hook shank behind the hook.
- Wrap thread to the hook eye and back to where the foam ends. Tie in a sparse Elk hair wing and a piece of flexament coated turkey primary. Legs can also be added at this time but I prefer to do that last.
- Wrap the thread up to the hook eye, covering the butts left from the Wing and secure with more head cement.
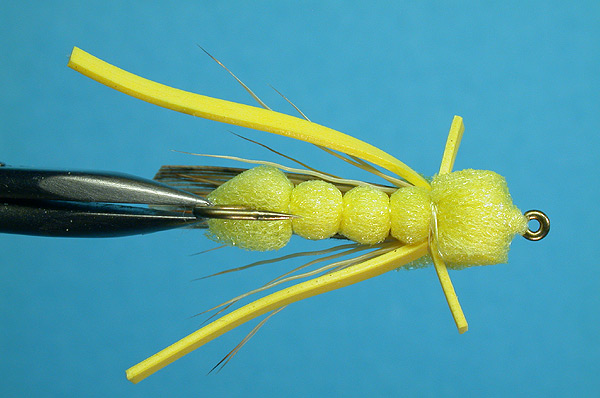
- Pull the foam tight on the bottom and secure it with 3 thread wraps just behind the hook eye.
- In one wide wrap, move the thread back to the point where the wings start. Pull the foam over and THROUGH the hook eye and secure it with 3-5 wraps. 11. You can now add the legs, if you didn't do that when the wings were added. I prefer to do it now. The legs are either knotted Pheasant Tail or 2 strands of rubber "hackle" knotted, clipping one of the strands after the knot.
- Place head cement on top of the thread wraps and whip finish, working the head cement into the wraps. Now, I go back and place head cement over each of the segmentation wraps. You should have a bit of foam protruding over the wing. You can clip this short for a more natural look but I normally leave a bit of foam for added floatation and visibility.