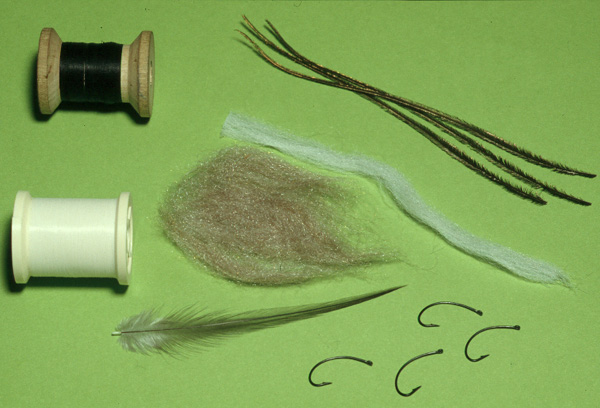
Klinkhĺmer special
Note: For flies tied on the CS 54 I double the amount of Poly yarn, Peacock herl and hackle windings.
The Klinkhĺmer - fifteen years later
When I look back in my dairies I always enjoy the old stories and it keeps my memories close and alive. I read them quite often. Sometimes I just read the fishing part and get a lot of pleasure from the notes about my trips but there are also times that I only search for the comments which I wrote during my tying experiences. For me it is very important why and how I came to a special pattern and why I use certain materials. When I read my notes I start to realise more and more how powerful this information from the past can be. I have a good number of flies but I am not a collector. I love to read the old stories in which I can find the thoughts and tricks behind a pattern clearly. I own a lot of old and interesting stuff as well; manuscripts, private letters about fly tying and articles from magazines like the Fishing Gazette and those I collect with pride. I have designed quite a lot of patterns and it is really handy to have a good source to take the correct information from. I also like to read the same kind of stories from others and with a few of my closest friends we often swap our dairies or notes. I read a lot about flies and many are designed as fancies, others arose accidentally and loads are close copies from insect imitations but I often miss some good stories behind the flies. I like to know the feelings from the originator and why he or she came to certain thoughts, tricks or techniques. I saw how flies do lose their names and changed so much that the history and the original dressing just fades away in only a few years.
Misunderstandings
It is not a secret that parachute flies belong to my most favourite patterns for almost 20 years now. My own experiences started with old traditional English shoulder hackle flies and it was just a coincidence that I met a very nice Swedish angler who has been responsible for a lot of changes in my fly-fishing and tying experiments. It was the “Rackelhanen” that set me free from old traditions , made me innovative and allowed me to think differently. In Scandinavia the “Rackelhanen” is still a very popular fly but worldwide this fly has never got the attention it surely deserves. I have no idea how my fly-fishing would look today without the discovery of the Rackelhanen but that wonderful sedge imitation gave me enormous self-confidence and inspiration to start a complete new way of fly-tying. I like it very much when fly tiers are innovative and creative but it doesn’t mean that the real story has to be changed too. I like to tell people from where I got my inspiration. Text easily can be changed and I have experienced it quite often myself when somebody wrote about one of my patterns and I was not able to recognize my own fly anymore. It happens a few times with the Klinkhĺmer too. I have seen it tied on straight hooks, with tails, different wings and bodies bigger then the thorax. Once a good friend of mine sent me a story in which the author made a 100% copy of the Klinkhĺmer, changed the name and claimed to be the inventor. That happening today and it only creates more misunderstandings. Wrong interpretation, different tying techniques and changing of materials surely lead to many questions. I am sure that’s why I got so many letters with questions the last three years. I also got several requests to do some new stories and I think it is an excellent opportunity for me to put a lot of misunderstandings right.
The past and the present
It’s been more then 15 years since my first Klinkhĺmer landed in the surface film of the mighty Glomma River and a lot has been happened since. In the last 10 years I read 43 Klinkhĺmer stories written by others and some were really good but most of them became a perfect example about how even authors misunderstood the thoughts behind the fly. It is sad and even when they gave me a lot of credit there always will be a lot of readers who still don’t know how to tie, use and fish the Klinkhĺmer in a proper way. As a fly tier it even hurts me when you see how one of your best patterns has been described in a completely wrong way. Some stories were about some clever improvements and different colour variations but if it affects the durability and floatability then I don’t see it as a real improvement. In this story I will try to explain where most people make their mistakes. The credit
Before people give me all the credit for the Klinkhĺmer they should know that I was not the only one struck with the idea of designing deep surface hanging parachute flies. Unknown to me at that time, Tomas Olsen, a famous Swedish fly tier, had created a similar pattern just one year before. With his melted technique (the best and most durable technique to build a parachute fly) he developed a similar but wingless fly, and in the USA Roy Richardson developed an equal emerger in 1986 without knowing about our flies. Therefore I find that they deserve as much credit for their creations as I got for my Klinkhĺmer. The name
( I think) I never have seen any pattern before that has been written wrongly about so much as the Klinkhĺmer. At least 30 different names I know about today. Some people didn’t know because in the mid-eighties I often sent information by handwriting and misunderstandings easily could happen but in the nineties several people changed the name purposely. I have no idea why? Of course I can’t deny that I felt really good when the Klinkhĺmer got so many good reviews but I was most proud about the fact that it was nobody else than Hans de Groot who invented the name that actually give it the power. In Germany they call it the Nordischer Hammer or Klinki in the States they prefer the Clinck and I often get questions about all kinds of Hammers from which I have never heard about before. I guess I have seen Pinkhammers, Yellowhammers and even Bluehammers and those just three out of many.
The real thoughts behind the Klinkhĺmer
I think before tying a Klinkhĺmer people should know the real thoughts behind my pattern. Although my first own variations from the Racklehanen did extremely well I wasn’t really satisfied with them. The reason was simple! At that time I didn’t know Kenneth Boström who designed the fly and I made some essential tying mistakes because I never had seen the proper tying techniques. Those mistakes prevent the fly from floating the way Kenneth invented it. My copies landed not always, as they should be and for some people a fly like that will be seen as a big failure or just an unsuitable pattern. I was lucky to fish the original fly at the first place so I know it has to be my own mistakes and I did my research and found the source. I had tied them with a single and much longer wing and sometimes they float in a wing-flat position through which they lost most of their effect. I also used too much floatant and in a wrong way as well. Fish rose for it like crazy but I simply missed too many takes. I probably landed only 3 out of 10 takes. To solve the problem I just add a hackle around the wing as I had seen it in the book by Eric Leiser and my first parachute pattern became a fact. After this improvement the flies floated as I wanted but it was not the only reason why I stayed with parachutes. Around the same time I discovered that flies that floated in the surface produced much more fish then patterns that were drifting on the surface. I also made another discovering and that probably was one of my biggest discoveries in my fly fishing so far. It was the Lady of the Stream that brought it to my attention. At that time I still used shoulder hackle flies a lot and I tied many with a nice strong tail and solid hackle. I like the way they floated high on the surface and I could see the flies very well. I loved it to see how the grayling came up for them but then on that certain day when I presented my fly not far out I saw how the fly has been pushed beside quite often by an aggressive taking grayling. I gave it a closer look and I frequently saw how they push it up and sideward.
Today I know a lot more about the grayling, her biotope and feeding behaviour. Most of the time she will feed on the bottom and she is built for it. For me this is the reason why I missed so many fish with shoulder hackle flies. Grayling can come up at very high speeds to take flies from the surface film, but because of her protruding upper lips, she is actually is a perfect bottom feeder. Those lips are ideal to pick up snails and larva from the bottom. Still the grayling found a beautiful way to rise to floating and emerging insects. Sometimes they even jump out of the water and take their prey from above. I have seen it hundreds of times. Concerning dry fly fishing I believe that it is a combination of the shape of her mouth, the speed of rise and way of taking the fly, which is responsible for the sliding away high floating surface flies at the moment of taking. This problem reduces enormously with parachute flies and even more with deep surface hanging emergers. I proved my theory right many times after the invention of the Klinkhĺmer. The iceberg shape solved the problem and eight out of ten fish are always hooked well in their upper lip.
Why fish IN the surface?
Fly fishing with parachutes has many benefits. It already starts with the presentation. A well-tied parachute fly doesn’t land only perfectly on the surface but also floats well the entire drift. In my personal opinion it is one of the most stable flies and with a good knowledge about fly tying materials you can use them in riffles and strong currents without any problems. The idea of a parachute fly is to present it in the surface that gives it also a better appearance to imitate insects and creates a wonderful silhouette as well. Maybe another reason why we usually have better results with parachute flies. When we try to imitate insects only a few points seems to be important. We look at the size, the shape, the colour and the mobility but I guess there are still some more points of interest. I still search for them every day. Several years ago I started to think different and when I hold my classes and workshop today I tell and explain to people about the silhouette a fly can produce. I don’t mention the shape anymore. I just try to look and see it in a different way. Wind can improve mobility and we already include it in our tying but how many people realise the effect from the sun on the fly in the water. I know it is important and it even has a great influence on patterns like spiders. I also have no other explanation why some selective fish take a fly when the sun sets or rises or just disappear behind a cloud.
Tying problems and misunderstandings
I guess we now are coming to the main reason for this story. I have to write about it because I have read and seen too many mistakes in other stories. I know not everyone will agree with my explanations but I will try to explain why I have my reasons to use certain materials like a curved wide gap hook and why I using a different tying technique to secure the parachute. I also will try to explain why I still use the same materials as 15 years ago and why I prefer it above all the others. Of course I know what I am talking about because I have tried to make dozens of improvements myself but not a single one proved to be better or more effective over the years.
The hackle
Unlike what most people think you need the best quality hackles from your cape when you building parachute flies. Several fly tiers and authors assert that the leftovers are ideal for parachutes but I disagree totally. Just think logical and you will easily agree with me. A parachute fly floats in the surface mainly because of a perfect balanced and well-tied horizontal hackle. A tail can be helpful but isn’t really necessary. The worse quality and the softer the hackle fibres the easier the fly will sink. There is also another important reason why you should use hackles with stiff fibres. Just think about the casting and the power that goes together with it. A parachute hackle tied with soft hackle fibres will easily lose the horizontal shape. The casting power will bend and reshape the fibres in an upright or vertical position before you even know it and it really takes not long. You will discover it quickly because the fly will go down faster and after a while it becomes impossible to keep it floating at all. I have seen stories with great pictures and many beautiful variations of the Klinkhĺmer but not one of the flies I even would dare to suggest or advise people to use or try. I have some very strong arguments for these comments as well because a parachute hackle made from just two or three hackle windings simply will not work. Even a try will be already a catastrophe because a weak hackle like that never will be able to hold the heavy hook in the surface. If you read carefully then you will notice also that you need a long hackle as well. You have to be able to make a lot of turns. Depending about the size of the fly it can go up to seven or eight and even more. If you tie flies you have to do it feelingly and a simple dish of water will tell you quickly if you are doing right or wrong. Even after tying thousands of flies I still use my dish of water today because I want to see the result and see how much the fly can handle before it will sink. I think I will finish these comments about hackles with another important fact. For parachute flies you can use large hackles very well. I have tied a whole bunch of Klinkhĺmers especially with what seems an oversized hackle at first. I don’t know what it exactly imitates, it could be a spider but I can assure you that it works well. I don’t know why but when I am in a group and when we put flies together mine seems always bigger.
The wing
Lets have a closer look about the wing material now. I wish my eyesight were much better for long distance. Then I would certainly use Tomas Olson’s melted wing technique for many of my parachutes. Unfortunately it is not and in some way I was very lucky. So when I started to produce parachute flies the wing became the most valuable part for me, and it even created a nice matter of minor importance later. My first priority was to see and locate the fly easier in broken water. When I started to use the Klinkhĺmer more frequently the wing created an unbelievable benefit for catching grayling that suck the flies from the surface without leaving any trace. The same happened with the Atlantic salmon and so here comes my luck that returns for my poor eyesight. It was so simple because as soon the big white wing was missing I knew a sucker took the fly. I landed hundreds of fish this way. A few important facts for my choice of wing material was that it had to be lighter then water, that it was not slippery and that you could pull the hackle windings far into the material. When you tie a lot of parachute flies then you will quickly notice that wing material, hackle and tying thread has to co-operate in perfect harmony. Does the thread or hackle slip of the wing easily then the parachute wouldn’t last long. The biggest mistake that some people make who try to copy the Klinkhĺmer is not realising how important the floatability from their yarn of choice should be. I have seen people tying huge Klinkhĺmers using wing material that sunk almost as fast as a little stone in the water. If you use big hooks like me you never can keep the fly floating when the wing and dubbing isn’t lighter then water. I usually advice people to check it out before they buy their winging material. Just cut off a tiny little piece of yarn, wrap it to a little pellet and drop it into a dish of water. If it floats on or in the surface you can use it without any problems and if it sinks just don’t buy it. The best available materials I use are Silicone yarn from Niche for very small parachute flies and the original poly-yarn from Wapsi for normal and big sizes. The latter one is available in many colours and the siliconised yarn only in 4 colours. If you use yarn test the fly and search for your own preferences about how many pieces and how much yarn you would like to use. It also depends the waters you want to fish. For rugged streams and big flies I usually double the amount. I have tried often to use alternate materials like foam and used it with some success as well but I always grab back to the yarn. Today there are many people using foam instead of yarn. It works great for the floatability but decrease the durability a lot. So if you don’t mind that little trout will damage the wing and have no problems with changing the fly more frequently you should be happy with it. There is also another good reason why so many people start to use foam for parachute flies! If you cut the foam shortly above the hackle it will expand and will push the hackle fibres downwards and it will surely give many parachute flies a much better appearance and floatability as well. So that means if you ever would run out of yarn use foam instead. About the length of wing size I have seen many variations too. Most examples in the stories had a rather short wing. I work the other way around. A wing that turned out to be too long easily can be shortening so that’s why I keep my wings long at first.
The body material
I think I don’t need many words for that. I mainly use two kinds of dubbing material for most of my parachutes. For normal and big flies I use extra fine Fly Rite poly dubbing and the answer is simple because I never could find anything better. The beautiful solid and perfect mixtures of blended colours will help you to imitate any colour of insect body. You can make your own mixtures as well and the material is lighter then water and so easy to use in combination with heavier hooks. The second material, which I mainly use on small flies, is from Wapsi too and is called Super Fine waterproof dry fly dubbing. It is much finer then fly rite and ideal for very little creations. Before I forget there are a few other essential points to remember. At first: in many Klinkhĺmer stories I saw people using an amount of dubbing that I probably use for 4 or 5 flies. The slimmer the body the more successful the fly! Believe me I tried all tricks and a bulky body always had produced less fish. Another point of interest is that if you were generous with dubbing, don’t cut it but try to use it as under body for the thorax. It also helps giving a good alternate if the less durable peacock herl seems to disappear. I destroyed more flies by unhooking fish then by playing, casting or fishing itself so a good reason to fish barbless as well. Realise that if you tie the Klinkhĺmer in a proper way it has to have a nice tapered underbody and I will explain later how to achieve this.
The thorax
Just a few months after I tied the first Klinkhĺmer I discovered that a nice thorax made from peacock herl makes the fly a lot more effective. At first the herls seemed to be very fragile but I found a very good solution to improve their durability. Dubbing (if darker then the body) works great as well but I think I just like it the way it is and peacock is a great colour anyway. Oliver Edwards explained in his workshops to tie in the peacock at the tips to make the tying easier and he is right. Some other people twist the peacock before winding and they also increase the durability so you just try it yourself. I just stay with the old technique because it is much quicker and I secure the peacock well by pressing a drop of thin varnish into the base of the wing to secure, wing, thread and thorax. You only need a good varnish applicator and it works perfectly because the varnish will spread out into all of them.
The hooks
I know everybody has his own preference for hooks. Mine will be a hook with a wide gap. My first Klinkhĺmer was tied on the partridge K2b known better as the Yorkshire caddis hook and at that time it was available in a much finer wire then today. A huge hook when you are comparing sizes. There were two reasons I changed the hook: the thicker wire and the up eye. I wanted a straight eye, especially when I am tying parachutes. I also wanted to keep the fine wire but also wanted my wide gap what gave me the best and easiest hooking. So this is how I kept on searching and I finally came to my own hook the Partridge GRS15ST. Many people write to me and tell me they have serious hooking problems with a Klinkhĺmer, which they don’t understand. They got many takes but miss a lot of fish as soon they set the hook. When I ask them what kind of hook they are using it turned out mostly that it is one of those smaller nymph hooks, curved but with a very small gap. So the answer is easy for me they miss a lot of their hooking potential. Then concerning hook sizes I discover that still most people believe that only small flies would work for grayling but I tell you this is not so. Grayling will come up and take flies up to size 6 and for wets they go even after bigger.
Spiderweb and the tie off technique
After so many years tying parachute flies I think the best idea with my parachutes is the use of Spiderweb for securing and tie off the parachute. It is made by Danville and very easy to obtain. I have demonstrated it so many times and shown how easy it is to secure a parachute wing well. For many people parachute flies looks difficult to tie but when I have my classes maximal felt up, I just need an hour and everybody is amazed that he or she can produce a parachute fly so quickly and easily. I have no clue why so many people still tie off the parachute in the old fashion way. It is much more complicated and the parachute fell apart more quicker too. I specially use spiderweb to prevent trout teeth damage to the hackle quill or thread windings. My greatest problem with my first parachute flies was that I was not satisfied with the securing and durability of the hackle. Although I fished intensively for grayling it sometimes happened that I hooked a trout. Those trout often destroyed the parachute and from that moment my interest in making more durable parachute hackles became my highest priority. It took me a whole winter season to find a technique that protected the hackle against those sharp little trout teeth. In this period of experiments and improvements I also looked for a much easier way to tie off the parachute hackle. Most people tie off the hackle at the eye of the hook. Using this method you have to pull away the hackle fibres first which makes the tie off more difficult. There are some special finger techniques possible to prevent this problem but I haven't seen many tiers using them. Although this is a solution to make the tying easier I still don't like it. It has no effect on the durability of the hackle. The hackle quill goes still directly from the wing post to the hook eye, which makes it easily breakable by the sharp teeth of a trout. In my opinion it is a fragile construction because when the quill breaks, the parachute comes off very quickly. It happened to me quite often while using my first parachutes. During other improvements I tried to make some extra windings through the thorax before securing the hackle. This makes the hackle more durable indeed, but also the tying more complicated. New is probably my idea to use Danville’s spiderweb to secure the hackle. My method has been designed to make winding a parachute a simple operation, while forming an effective, durable fly at the same time without damaging any of the hackle fibres. With normal thread you never would be able to get the same results.
THE TYING TECHNIQUE
(step by step photographs: Rudy van Duijnhoven)
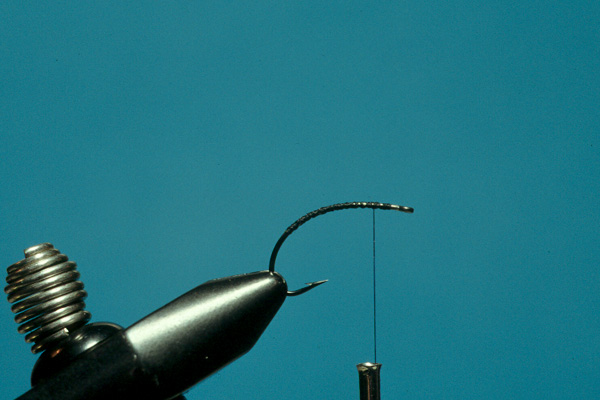
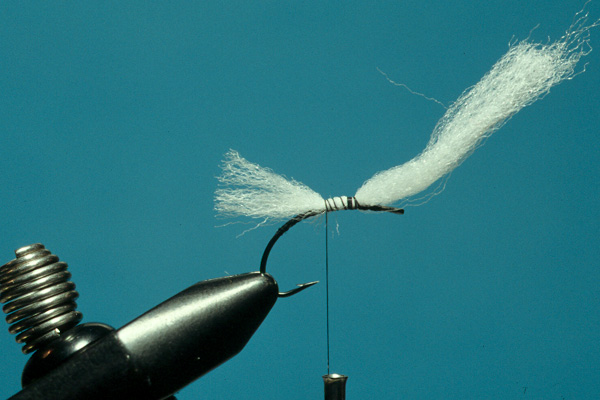
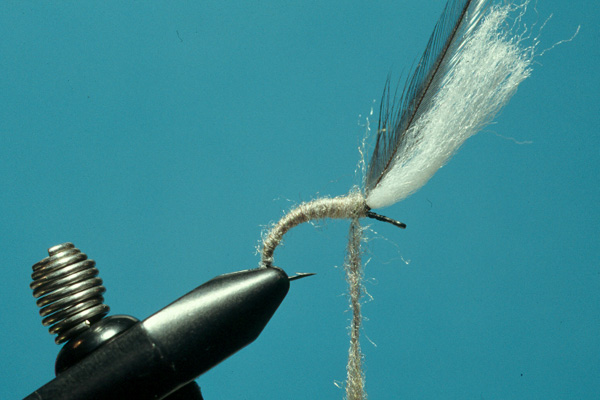
- Cut off a strand of poly-yarn and taper the tip with your scissors before tying in; this is to be sure the underbody will be as slim as possible. Secure the yarn onto the top of the hook shank with the thread at the position shown.
- Wrapping your thread down to the bend and backwards.
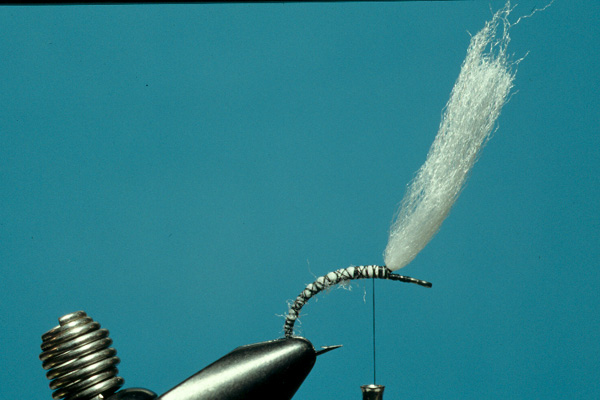
- Try to make a nice tapered under body. I like a slim and well-tapered under body. Be very critical in this stage! The better the under body the more beautiful the completed fly.
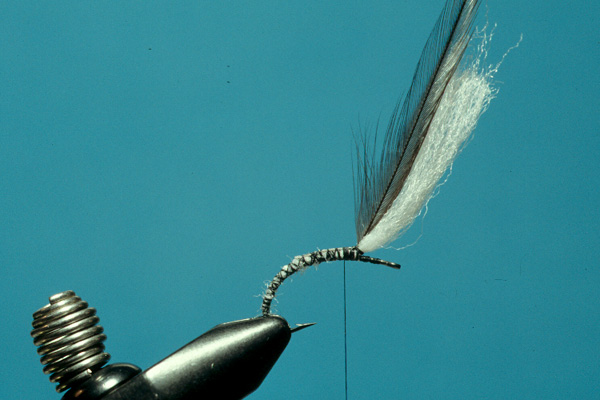
- Tie in the hackle so it lies in the same orientation as the yarn. Form an upright wing by tying up the yarn and hackle. This is to be sure you have no problems with the hackle in the other tying steps.
- Apply a small amount of dubbing to the thread. Take as much dubbing just to cover the under body. Tie the body very slim and well tapered. Start as close to the barb as possible. The thinner the body the more successful the pattern. Wind it along the shank and stop just behind the wing and cut off surplus poly or use the last piece of dubbing as underground for the thorax. In that situation it is not really necessary to cut off surplus. I recommend trying both techniques because for some people it is much easier to produce a better-looking thorax when you have made an under body.
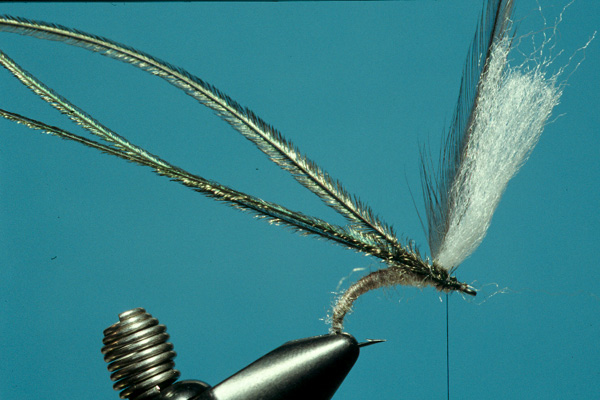
- Tie in three peacock herl fibres. You can also tie the strands in at their tips, this will help you to create a much nicer thorax. I secure the strands well also behind the wing. This provides that the thorax will come off.
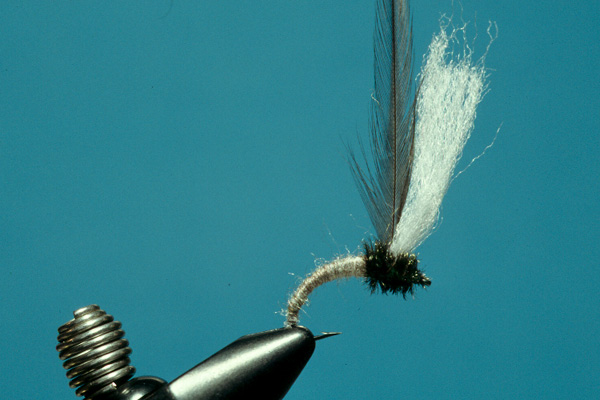
- TIE OFF and varnish.
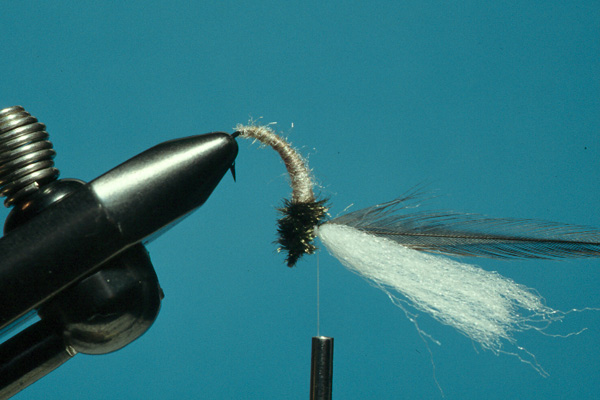
- TAKE YOUR BOBBIN WITH SPIDERWEB!!!!
Now turn the hook in the vice, so that the wing is horizontal, with the bend uppermost. Grasping the tuft of poly-yarn, put on the spiderweb, wind several turns around the base of the poly-yarn and create a rigid wing base on which to wind the hackle.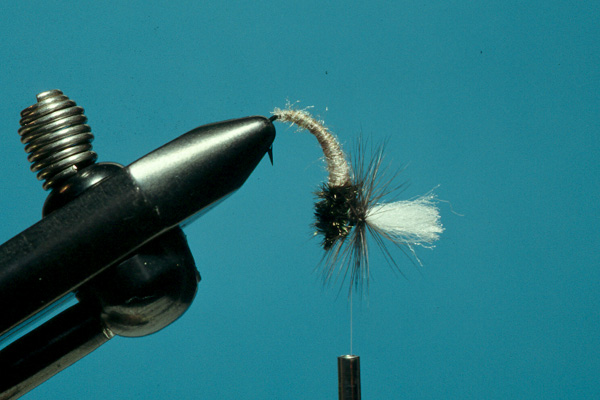
- Wind the hackle around the base. Start at the top of your wing base, taking each successive turn closer to the hook shank. Take as many turns as the type of hook requires. Small flies about 5 windings and bigger flies at least 7 or 8 windings. Remember that the fly has to float mainly on the parachute. A lot of people wind their hackle in the opposite way, working up the wing, the hackle is less durable and may still come off. When you work from top downwards it ensures a compact well-compressed hackle and a most durable construction. Pulling the hackle tip to the opposite direction as the wing and secure with a few turns of spiderweb. Secure well around the base of the wing between the wound hackle and body. Using your whip finisher. Trim away the waste hackle tip and hackle fibres that are pointed down. Take your varnish applicator and apply some lacquer on the windings just under the parachute.
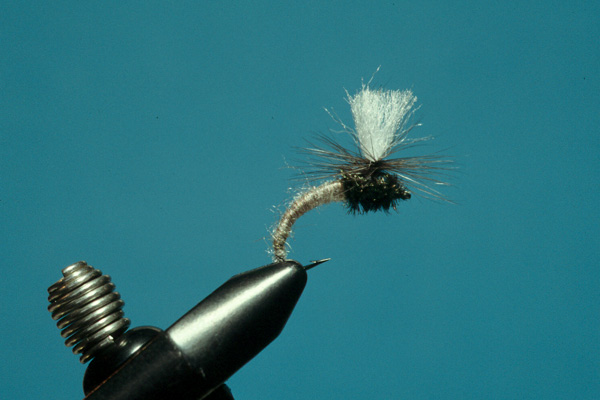
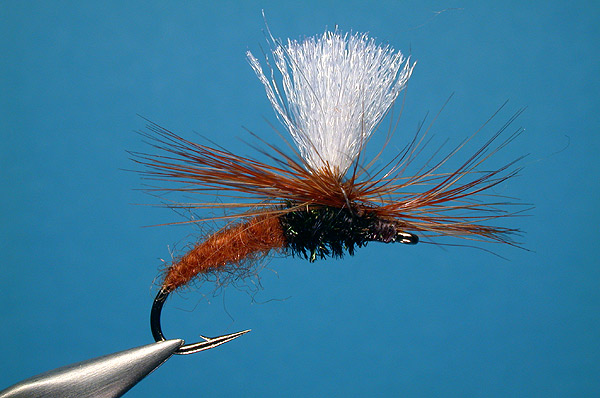
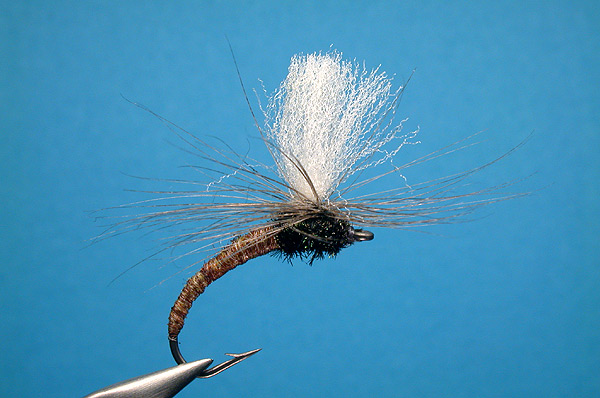
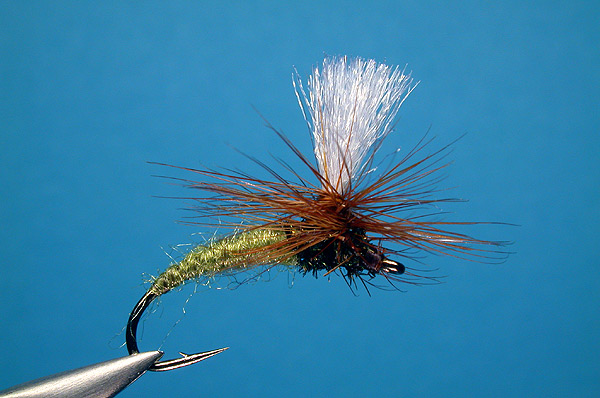
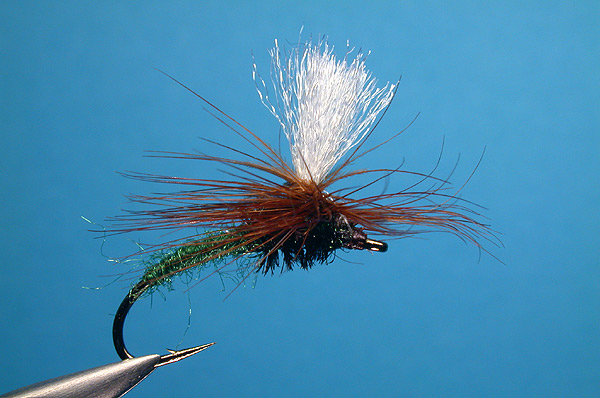
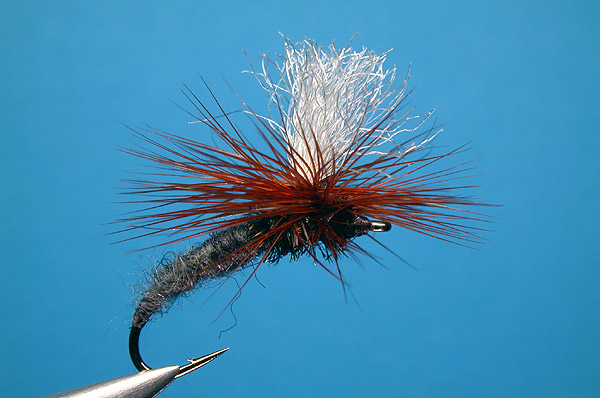
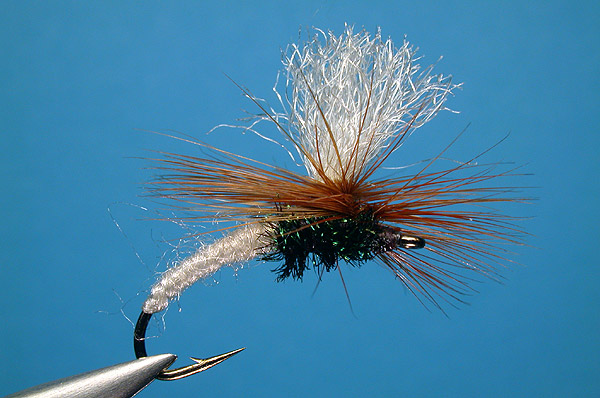
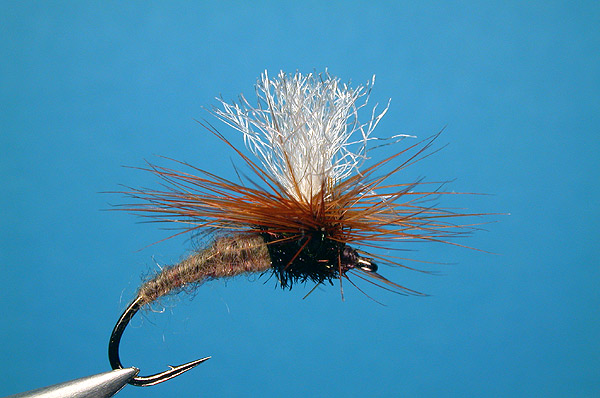
- The completed fly
(For the CS54 it is necessary to reshape the hook between thumb and forefinger. Place the hook in the vice and wrap the entire shank with the tying thread. This avoids the difficulty of a slipping wing when the fly is finished.)